Step-by-Step Implementation of the Project
Step-by-Step Implementation (React Weather App)
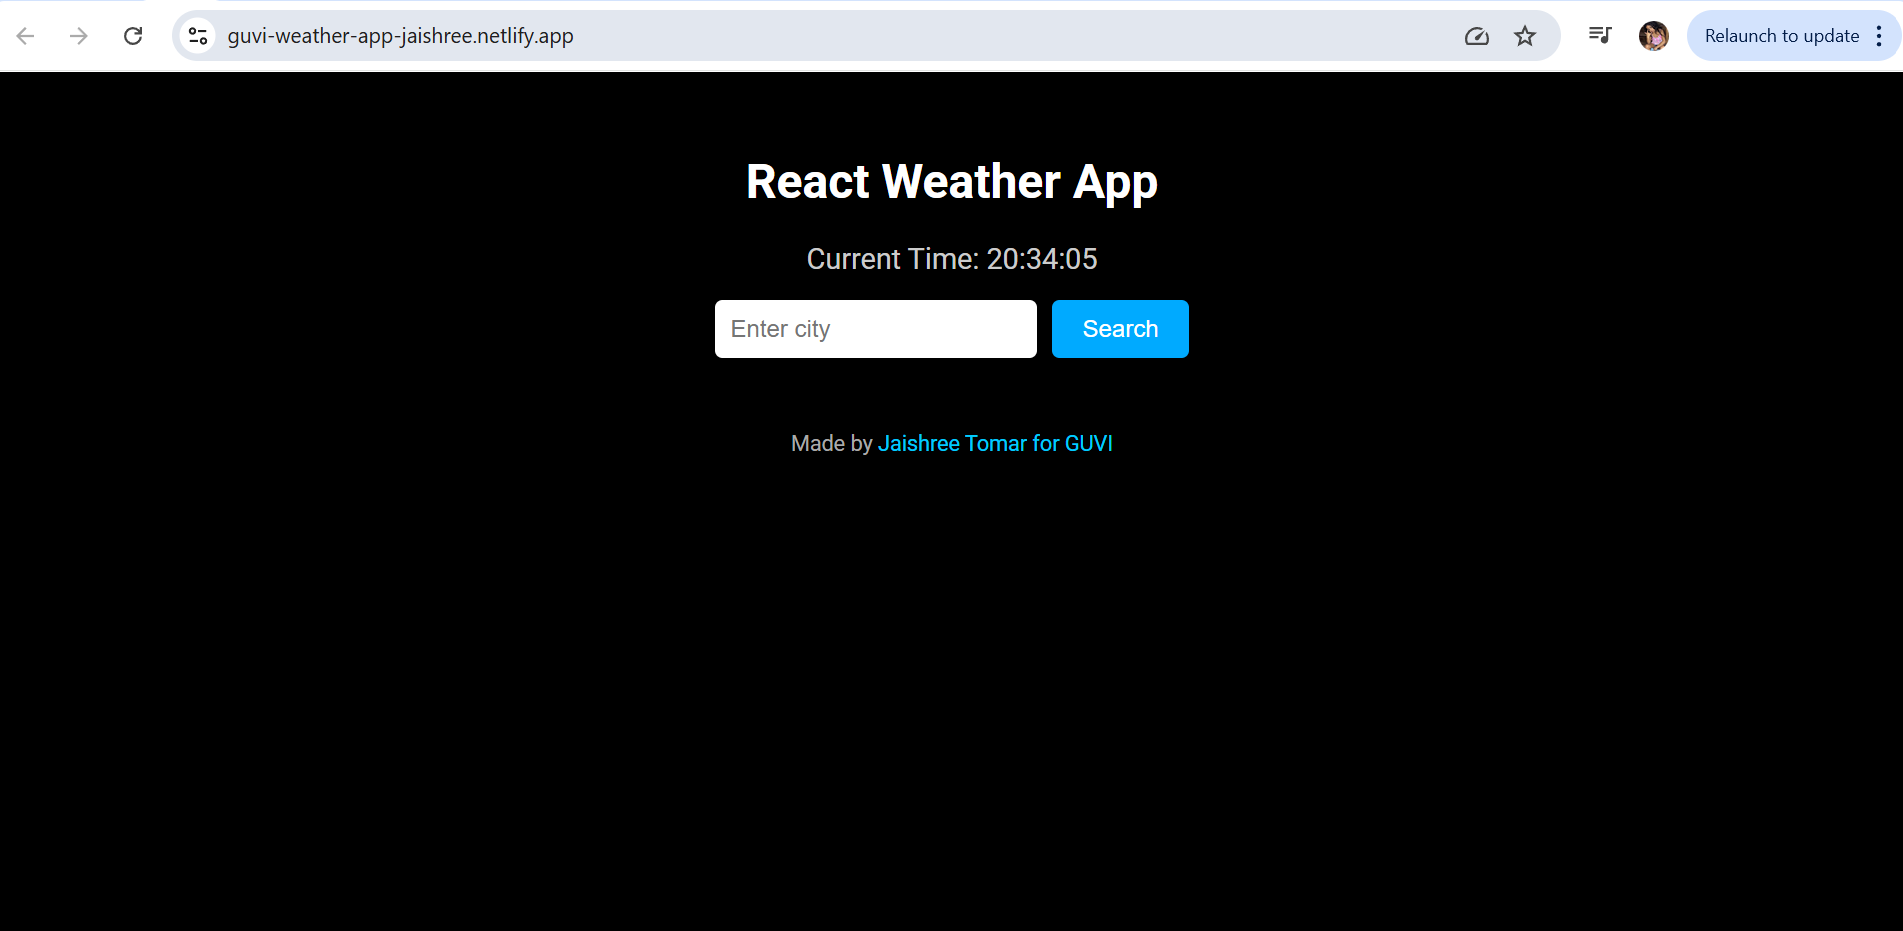
Welcome to the build-along! In this module, you’ll code and create the full Weather App one step at a time. We’ll guide you through the environment setup, folder structure, building components, styling, and running the app. Make sure to follow along line by line, and by the end, your weather app will be live and functional.
Set Up the Environment
Step 1: Install Node.js & npm
Visit nodejs.org, download and install the LTS version.
Step 2: Verify Installation
Open a terminal or command prompt and type:
node -v
npm -v
You should see version numbers printed. If you do, you're good to go!
Step 3: Create Your React App
Run the following commands in your terminal:
npx create-react-app weather-app
cd weather-app
Your base project is now set up. Let’s move on!
Set Up Folder Structure
We’ll organize the app files for better readability and scalability. Inside src, create two folders:
mkdir src/components
mkdir src/api
Your final structure should look like this:
src/
├── api/
│ └── WeatherService.js # Weather API logic
├── components/
│ ├── SearchBar.js # Input + Search button
│ ├── WeatherCard.js # Displays weather info
│ └── TimeDisplay.js # Live clock
├── App.js # Main app component
├── App.css # Global styling
└── index.js # Entry point
Build the App One Component at a Time
Step 1: App.js — The Main Brain
Open src/App.js and replace its contents with the following:
import React, { useState } from 'react';
import './App.css';
import { getWeatherByCity } from './api/WeatherService';
import SearchBar from './components/SearchBar';
import WeatherCard from './components/WeatherCard';
import TimeDisplay from './components/TimeDisplay';

function App() {
  const [weatherData, setWeatherData] = useState(null);
  const [loading, setLoading] = useState(false);
  const [error, setError] = useState('');

  const handleSearch = async (city) => {
    if (!city) return;
    setLoading(true);
    setError('');
    setWeatherData(null);
    try {
      const data = await getWeatherByCity(city);
      setWeatherData(data);
    } catch {
      setError('City not found. Please try another one.');
    } finally {
      setLoading(false);
    }
  };

  return (
    <div className="App">
      <h1>React Weather App</h1>
      <TimeDisplay />
      <SearchBar onSearch={handleSearch} />
      {loading && <p>Loading...</p>}
      {error && <p className="error">{error}</p>}
      {weatherData && <WeatherCard data={weatherData} />}
      <footer>
        Made by <a href="https://www.guvi.in" target="_blank" rel="noreferrer">Jaishree Tomar for GUVI</a>
      </footer>
    </div>
  );
}

export default App;
Step 2: WeatherService.js — Talk to the API
Create a file inside src/api/WeatherService.js and paste:
const API_KEY = 'b02928db49861b163d51b3cd51120419';
const BASE_URL = 'https://api.openweathermap.org/data/2.5/weather';

export const getWeatherByCity = async (city) => {
  const response = await fetch(`${BASE_URL}?q=${city}&appid=${API_KEY}&units=metric`);
  if (!response.ok) {
    throw new Error('City not found');
  }
  return await response.json();
};
This fetches data from OpenWeatherMap using a city name.
Don’t forget: Replace the API key if you generate your own at openweathermap.org.
Step 3: SearchBar.js — Let Users Type a City
Inside src/components/SearchBar.js, paste:
import React, { useState } from 'react';

const SearchBar = ({ onSearch }) => {
  const [city, setCity] = useState('');

  const handleKeyPress = (e) => {
    if (e.key === 'Enter') onSearch(city);
  };

  return (
    <div className="search-bar">
      <input
        type="text"
        placeholder="Enter city"
        value={city}
        onChange={(e) => setCity(e.target.value)}
        onKeyPress={handleKeyPress}
      />
      <button onClick={() => onSearch(city)}>Search</button>
    </div>
  );
};

export default SearchBar;
Now the user can type a city and press enter or click the search button.
Step 4: WeatherCard.js — Display Weather
Inside src/components/WeatherCard.js, paste:
import React from 'react';
import './WeatherCard.css';

const WeatherCard = ({ data }) => {
  const { name, main, weather, wind } = data;

  return (
    <div className="weather-card">
      <h2>{name}</h2>
      <img src={`https://openweathermap.org/img/wn/${weather[0].icon}@4x.png`} alt={weather[0].description} />
      <p>{weather[0].main} - {weather[0].description}</p>
      <p>🌡 Temp: {main.temp} °C</p>
      <p>💧 Humidity: {main.humidity}%</p>
      <p>🌬 Wind: {wind.speed} m/s</p>
    </div>
  );
};

export default WeatherCard;
Create a CSS file: src/components/WeatherCard.css
.weather-card {
  background-color: #1c1c1c;
  padding: 2rem;
  margin-top: 2rem;
  border-radius: 12px;
  animation: fadeIn 1s ease-in-out;
}

.weather-card img {
  width: 100px;
  animation: float 2s infinite ease-in-out;
}

@keyframes float {
  0%, 100% {
    transform: translateY(0px);
  }
  50% {
    transform: translateY(-10px);
  }
}
Step 5: TimeDisplay.js — Show Real-Time Clock
Inside src/components/TimeDisplay.js, paste:
import React, { useState, useEffect } from 'react';

const TimeDisplay = () => {
  const [time, setTime] = useState(new Date().toLocaleTimeString());

  useEffect(() => {
    const interval = setInterval(() => {
      setTime(new Date().toLocaleTimeString());
    }, 1000);
    return () => clearInterval(interval);
  }, []);

  return <p className="time-display">Current Time: {time}</p>;
};

export default TimeDisplay;
Style the App
Open src/App.css and replace it with the following styles:
body {
  margin: 0;
  font-family: 'Segoe UI', Tahoma, Geneva, Verdana, sans-serif;
  background-color: #000;
  color: #fff;
  text-align: center;
}

.App {
  padding: 2rem;
}

input {
  padding: 10px;
  font-size: 1rem;
  margin-right: 10px;
  border-radius: 5px;
  border: none;
}

button {
  padding: 10px 20px;
  font-size: 1rem;
  background-color: #00aaff;
  border: none;
  border-radius: 5px;
  color: #fff;
  cursor: pointer;
}

button:hover {
  background-color: #008fcc;
}

.error {
  color: red;
  margin-top: 1rem;
}

footer {
  margin-top: 3rem;
  font-size: 0.9rem;
  color: #aaa;
}

footer a {
  color: #00ccff;
  text-decoration: none;
}

footer a:hover {
  text-decoration: underline;
}

.time-display {
  margin-bottom: 1rem;
  font-size: 1.2rem;
  color: #ccc;
}
You’ve added a dark, clean theme with floating icons and animations.
Run and Test the App Locally
In the terminal, start the development server:
npm start
Go to http://localhost:3000. Try typing cities like London, Tokyo, or Mumbai — and watch the weather show up! You did it!


