Implementing Temperature Converter Step-by-Step
Implementation of Temperature Converter Project
This is where the real building begins. You'll create the app from scratch, setting up the environment, organizing the folder structure, writing logic for temperature conversion, and applying clean CSS styling. By the end of this lesson, you'll have a fully functional and visually appealing converter running locally.
Set Up the Environment
Let’s begin by setting up our development environment and initializing a new React project.
Install Node.js: If you haven’t already, install Node.js from the official website. This also installs npm. Having Node.js (version 14 or above) is required to create and run React apps.
Create a New React App: Open your terminal/command prompt, navigate to the folder where you want to create the project, and run the following command:
npx create-react-app temp-converter
This uses the Create React App toolkit to set up a new React project named temp-converter (you can choose any name) with all the necessary configuration. Wait for the command to finish; it will create a new directory called temp-converter with the project files.
Navigate to Project Directory: Move into the project folder by running:
cd temp-converter
Start the Development Server: While in the project directory, start the React development server by running:
npm start
This will compile and launch the default React app on your local machine. Open http://localhost:3000 in your web browser, and you should see the default React welcome page. This confirms that our environment is set up correctly and the base app is running.
Create Application Structure (Directory Structure)
A new React app comes with a standard directory structure. Our project’s structure (after using Create React App) looks like this by default:
temp-converter/
├── node_modules/ # Contains all Node.js dependencies (auto-generated)
├── public/
│ ├── index.html # HTML template for the app (contains a root <div>)
│ └── ... # Other public assets (favicon, manifest, etc.)
├── src/
│ ├── App.js # Main React component (will be our container)
│ ├── App.css # CSS for App component
│ ├── index.js # Application entry point, renders App into DOM
│ ├── index.css # Global CSS (if any)
│ └── ... # Other files (logo, test files, etc.)
├── package.json # Project metadata and dependencies
├── package-lock.json # Auto-generated lockfile for dependencies
└── README.md # Basic README with Create React App info
For our project, we will add a new component file and possibly modify or remove some default files:
- We will create a new component inside the src folder, e.g. TemperatureConverter.js (or .jsx), which will house the conversion logic and UI.
- We will update App.js to use our new component and serve as a simple container with a title.
- We will use App.css (or create a new CSS file) to add styling for our components (like making the layout centered and styling the input, dropdowns, etc.).
- The public/index.html usually doesn’t need changes for this project, but we could change the <title> tag there to "Temperature Converter" so the browser tab reflects our app name.
- We won’t need the default logo.svg or App.test.js for this simple project, so you can remove or ignore those to keep the project uncluttered.
After creating a new folder called component, the src folder structure will look like this:
src/
├── components/
│ └── TemperatureConverter.js # Our TemperatureConverter component
├── App.js
├── App.css
├── index.js
└── index.css
Now, let's proceed to implement the functionality step by step.
Implementation Steps
Step 1: Plan the Component Structure
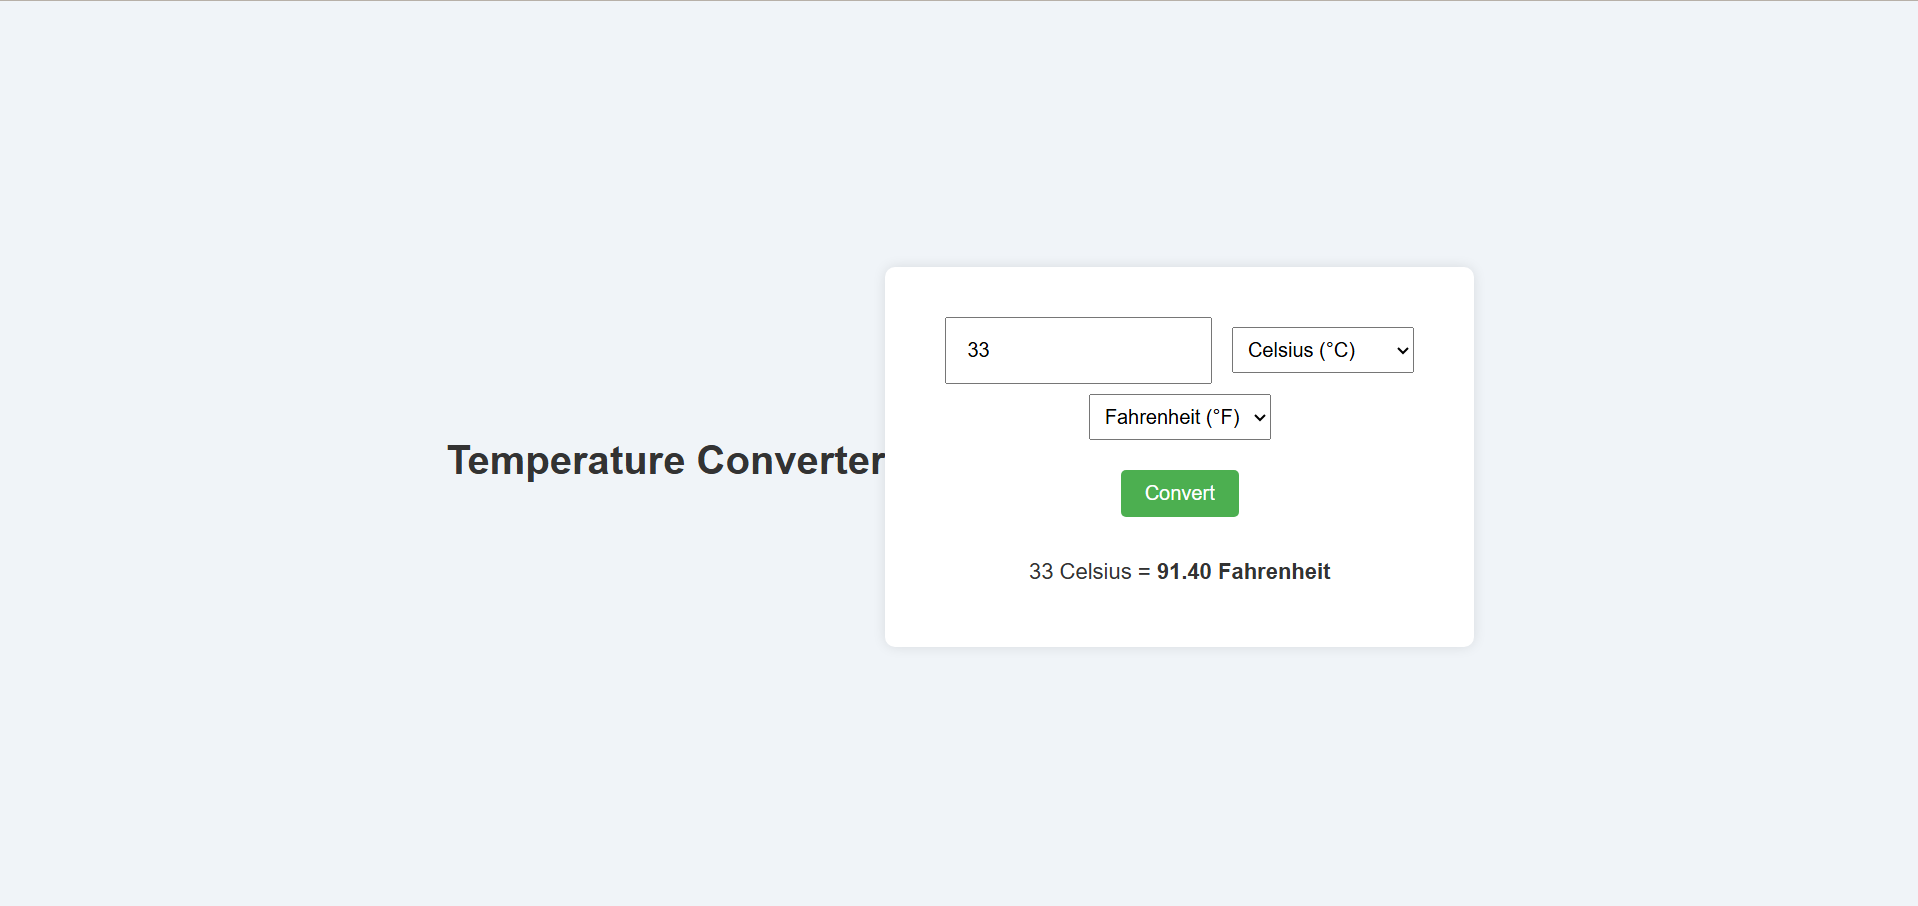
We will implement the converter UI as a separate component called TemperatureConverter. This component will contain:
- An input field for the temperature value.
- Two dropdowns (select elements) for the "from" and "to" units.
- A button to perform the conversion.
- A display area for the result or error message.
We'll use React state to keep track of the input value, selected units, and conversion result. We will also write helper functions for the conversion formulas.
Step 2: Create the TemperatureConverter Component
Create a new file TemperatureConverter.js in the src/components folder and add the following code:
// src/components/TemperatureConverter.js
import React, { useState } from 'react';

function TemperatureConverter() {
  // State variables for input temperature, units, result, and error message
  const [tempVal, setTempVal] = useState("");           // input temperature value as string
  const [fromUnit, setFromUnit] = useState("Celsius");   // default from-unit
  const [toUnit, setToUnit] = useState("Fahrenheit");    // default to-unit
  const [result, setResult] = useState(null);            // result of conversion (null means no result yet)
  const [error, setError] = useState("");                // error message, if any

  // Handler for input field change
  const handleTempChange = (e) => {
    setTempVal(e.target.value);
  };

  // Handler for changing the "from" unit selection
  const handleFromUnitChange = (e) => {
    setFromUnit(e.target.value);
  };

  // Handler for changing the "to" unit selection
  const handleToUnitChange = (e) => {
    setToUnit(e.target.value);
  };

  // Conversion function that calculates result when called
  const convertTemperature = () => {
    // Convert input string to number
    const value = parseFloat(tempVal);

    // Validate input: check if it's a number
    if (isNaN(value)) {
      setResult(null);
      setError("Please enter a valid numeric temperature.");
      return;
    }

    // Validate that fromUnit and toUnit are different
    if (fromUnit === toUnit) {
      setResult(null);
      setError("Please select two different units to convert.");
      return;
    }

    setError(""); // clear any previous errors

    let output; // will hold the converted value

    // Perform conversion based on units
    if (fromUnit === "Celsius" && toUnit === "Fahrenheit") {
      output = (value * 9/5) + 32;
    } else if (fromUnit === "Fahrenheit" && toUnit === "Celsius") {
      output = (value - 32) * 5/9;
    } else if (fromUnit === "Celsius" && toUnit === "Kelvin") {
      output = value + 273.15;
    } else if (fromUnit === "Kelvin" && toUnit === "Celsius") {
      output = value - 273.15;
    } else if (fromUnit === "Fahrenheit" && toUnit === "Kelvin") {
      // Fahrenheit to Kelvin: first convert to Celsius, then to Kelvin
      output = (value - 32) * 5/9 + 273.15;
    } else if (fromUnit === "Kelvin" && toUnit === "Fahrenheit") {
      // Kelvin to Fahrenheit: first convert to Celsius, then to Fahrenheit
      output = (value - 273.15) * 9/5 + 32;
    }

    // Save the result (to 2 decimal places) in state
    setResult(output.toFixed(2));
  };

  return (
    <div className="converter-container">
      {/* Input field */}
      <div className="input-group">
        <input
          type="text"
          className="temp-input"
          placeholder="Enter temperature"
          value={tempVal}
          onChange={handleTempChange}
        />
        <select className="unit-select" value={fromUnit} onChange={handleFromUnitChange}>
          <option value="Celsius">Celsius (°C)</option>
          <option value="Fahrenheit">Fahrenheit (°F)</option>
          <option value="Kelvin">Kelvin (K)</option>
        </select>
      </div>

      {/* Dropdown for target unit */}
      <div className="input-group">
        <select className="unit-select" value={toUnit} onChange={handleToUnitChange}>
          <option value="Celsius">Celsius (°C)</option>
          <option value="Fahrenheit">Fahrenheit (°F)</option>
          <option value="Kelvin">Kelvin (K)</option>
        </select>
      </div>

      {/* Convert button */}
      <button className="convert-button" onClick={convertTemperature}>
        Convert
      </button>

      {/* Output display */}
      <div className="output">
        {error && (
          <p className="error-message">{error}</p>
        )}
        {result !== null && !error && (
          <p className="result-message">
            {tempVal} {fromUnit} = <strong>{result} {toUnit}</strong>
          </p>
        )}
      </div>
    </div>
  );
}

export default TemperatureConverter;
Let’s break down what this code does:
- We import useState from React and initialize several state variables: tempVal, fromUnit, toUnit, result, and error. Each serves a purpose explained in the comments.
- We define handler functions handleTempChange, handleFromUnitChange, and handleToUnitChange to update state when the user inputs a value or changes the selected units. These functions use the setState functions (setTempVal, setFromUnit, etc.) to update the respective state.
- The core logic lies in the convertTemperature function. This is called when the user clicks Convert. It:
- Parses the input string to a number (parseFloat). If it's not a number (NaN), we set an error message asking for a valid number and abort the conversion.
- Checks if the source and target units are the same. If so, it sets an error asking the user to pick different units (because converting a unit to itself is trivial or not meaningful).
- If both checks pass, it clears any previous error and then uses conditional statements to compute the conversion based on the combination of fromUnit and toUnit. For each case, we apply the appropriate formula. We handle Fahrenheit–Kelvin via an intermediate conversion or direct formula as shown.
- The result is then formatted to two decimal places (toFixed(2)) and stored in the result state.
- The JSX return of the component constructs the UI:
- An input field where the user enters the temperature. Its value is bound to tempVal state and onChange updates that state.
- A dropdown (<select>) for the “from” unit, with options for Celsius, Fahrenheit, Kelvin. It’s bound to fromUnit state.
- Another dropdown for the “to” unit, bound to toUnit state.
- A Convert button that calls convertTemperature on click.
- An output area: if there's an error (non-empty error state), we display the error message in a <p> tag with a class for styling. If there’s a result (i.e., result is not null and no error), we display the conversion result in a formatted message.
At this point, our component logic is ready. Next, we need to integrate it into our main App and apply some styling for a better UI.
Step 3: Integrate the Component in App.js
Now open the src/App.js file and modify it to use our new TemperatureConverter component. For example:
// src/App.js
import React from 'react';
import './App.css';
import TemperatureConverter from './components/TemperatureConverter';

function App() {
  return (
    <div className="App">
      <h1>Temperature Converter</h1>
      <TemperatureConverter />
    </div>
  );
}

export default App;
Changes we made here:
- We import the CSS (App.css) for styling.
- We import our TemperatureConverter component (ensure the path is correct).
You can save these changes. The core functionality of the app is now implemented. All that’s left is to style it so that it looks nice and is easy to use.
Step 4: Add CSS Styling
Open src/App.css and add styles to make the app visually appealing and mobile-friendly. We will center the content and style the form controls (input, selects, button, output). For example:
/* src/App.css */

/* Make body full-height and center content */
body {
  margin: 0;
  font-family: Arial, sans-serif;
  background-color: #f0f4f8;            /* a light gray-blue background */
}

/* Container for the app */
.App {
  min-height: 100vh;                   /* full viewport height */
  display: flex;
  justify-content: center;
  align-items: center;
  text-align: center;
}

/* The converter form container */
.converter-container {
  background: #fff;
  padding: 2rem 3rem;
  border-radius: 8px;
  box-shadow: 0 0 10px rgba(0,0,0,0.1);
}

/* Title inside App */
.App h1 {
  color: #333;
  margin-bottom: 1rem;
}

/* Input group styling */
.input-group {
  margin: 0.5rem 0;
}

/* Temperature text input */
.temp-input {
  width: 12ch;  /* width to fit about 12 characters */
  padding: 0.5rem;
  font-size: 1rem;
  margin-right: 0.5rem;
}

/* Dropdown selects */
.unit-select {
  padding: 0.5rem;
  font-size: 1rem;
}

/* Convert button */
.convert-button {
  margin: 1rem 0;
  padding: 0.6rem 1.2rem;
  font-size: 1rem;
  background-color: #4caf50;   /* green background */
  color: white;
  border: none;
  border-radius: 4px;
  cursor: pointer;
}
.convert-button:hover {
  background-color: #45a049;   /* darker green on hover */
}

/* Output message styles */
.output {
  margin-top: 1rem;
}
.error-message {
  color: #e74c3c;   /* red for errors */
  font-weight: bold;
}
.result-message {
  color: #333;
  font-size: 1.1rem;
}
Feel free to adjust colors or spacing as you like; the above CSS is just an example that keeps things simple. The important thing is we’ve used plain CSS (no additional frameworks) and kept everything in App.css which is imported into our App.
Step 5: Test the Application Locally
Now that we have written the code and styles, it’s time to run the app and test it. If your development server (npm start) is still running, it should automatically reload with the new changes. If not, start it again with npm start.
Open http://localhost:3000 in your browser to view the application. Try the following to ensure everything works:
- Enter a number (e.g., 100) in the input field.
- Select Celsius in the first dropdown and Fahrenheit in the second, then click Convert. You should see an output like 100 Celsius = 212.00 Fahrenheit (since 100°C = 212°F).
- Change the “from” unit to Fahrenheit and “to” unit to Kelvin, input 32, and click Convert. You should get 32 Fahrenheit = 273.15 Kelvin (freezing point of water in Kelvin).
- Try a non-numeric input (e.g., type “abc”) and click Convert, you should get an error asking for a valid numeric temperature.
- Test a negative value (e.g., -40 Celsius to Fahrenheit should give -40.00 Fahrenheit because -40 is the point where Celsius and Fahrenheit coincide).
If all these work correctly, congratulations! 🎉 You have a fully functioning temperature converter application running on your local machine.


